Here you will find a description of the full menu in a Kimax 2 device.
1. You enter the menu by pressing the button ![]() for more than 2 seconds and then let go.
for more than 2 seconds and then let go.
The factory configuration of your Kimax system may be different from what you see here. You can customize your own Kimax system using the Kimax Terminal. Download is available from our support page.
2. You can scroll through the menu on your device by pressing the buttons ![]() or
or ![]() .
.
3. You get access to the displayed menu function by pressing the button ![]() .
.
On this page you can walk through all menus or simply jump to the menu you want to explore.
![]() Attention - Whenever you want to change a setting you must unlock the device first. Have a look at the "Loc" section.
Attention - Whenever you want to change a setting you must unlock the device first. Have a look at the "Loc" section.
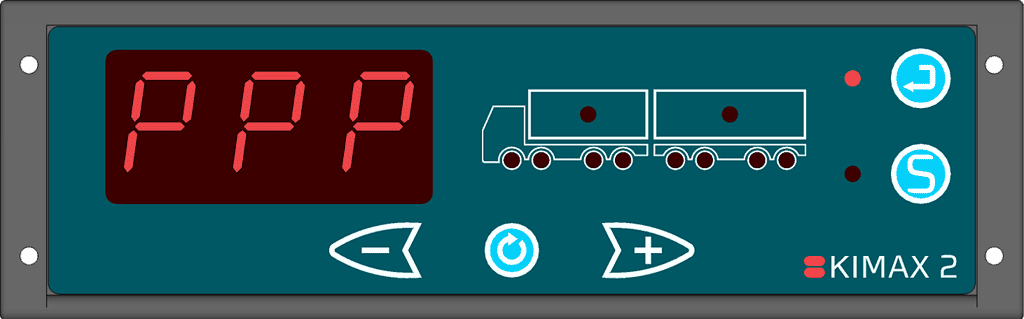
PPP - print-out
To get a printed copy of your load you will need to connect a printer to the Kimax 2 device.
Pressing the button ![]() while the display reads PPP, you will get a printed copy of your actual load.
while the display reads PPP, you will get a printed copy of your actual load.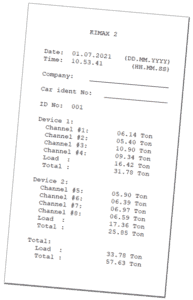
After printing, the Kimax 2 leaves the menu and returns to normal reading of the weight.
The printer must be set-up as shown here:
| Baud rate | 4.800 |
|---|---|
| Data bit | 8 |
| Parity | N |
| Stop bit | 1 |
| Flow control | N |
Electric diagram and video explaining how to connect a printer to your Kimax 2 device.
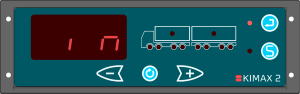
in - input monitor
Pressing the button ![]() opens the in menu, where you can read a relative value, ranging from 0,00% to 100%.
opens the in menu, where you can read a relative value, ranging from 0,00% to 100%.
The display reads either the actual SG sensor value for first active channel or you will get a "0-10" bar reading in case of an air inlet.
You may switch through the active channels on your Kimax 2 device by pressing the button ![]() (up to 16 active channels may be present depending on the system you have). The selected channel is indicated by light in the associated "wheel" LED.
(up to 16 active channels may be present depending on the system you have). The selected channel is indicated by light in the associated "wheel" LED.
Pressing the button ![]() again will get you back to the in menu.
again will get you back to the in menu.
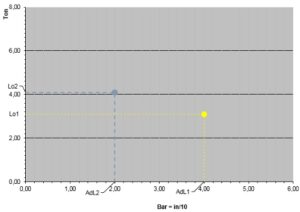
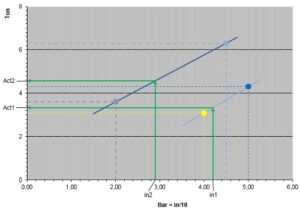
The diagram below indicates in1 = 40 = 4,0 bar and in2 = 20 = 2,0 bar as an example from a 2-axle truck.
![]()
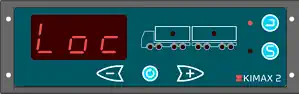
Loc
By pressing the button ![]() while the display reads "Loc" you will enter the lock/unlock menu and the display will read "-L-".
while the display reads "Loc" you will enter the lock/unlock menu and the display will read "-L-".
To unlock the Kimax 2 device you have to change the reading to "-u-" by pressing the button ![]() and then you must press the button
and then you must press the button ![]() to save/confirm the unlock command. Now the device will be open for recalibration and / or change of selectable settings.
to save/confirm the unlock command. Now the device will be open for recalibration and / or change of selectable settings.
You leave the "-u-" reading by pressing the button ![]() and the display will read "Loc". From here you may proceed to which setting you wish to change for example Lo cal or Hi cal.
and the display will read "Loc". From here you may proceed to which setting you wish to change for example Lo cal or Hi cal.
The device remain unlocked until:
-You return to the weight reading
-You power off the device or
-You lock the device entering the "Loc" menu by pressing the button ![]() when the display reads "Loc" and then change the "-u-" to "-L-" by pressing the button
when the display reads "Loc" and then change the "-u-" to "-L-" by pressing the button ![]() and finally you must save/confirm the command by pressing the button
and finally you must save/confirm the command by pressing the button ![]() .
.
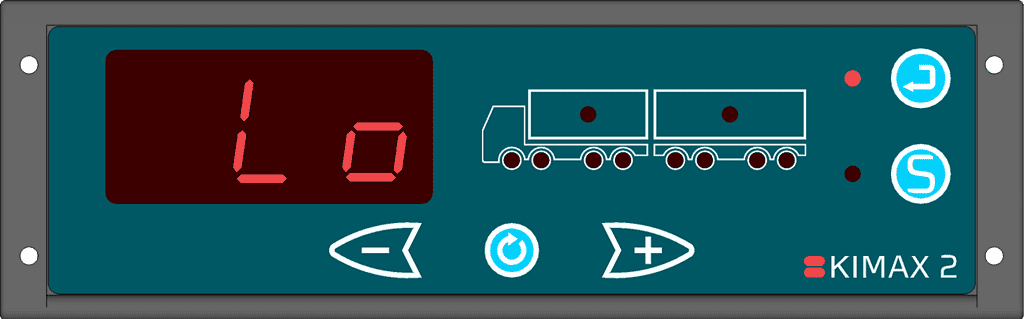
Lo
![]() Attention - Whenever you want to change a setting you must unlock the device first. Have a look at the "Loc" section.
Attention - Whenever you want to change a setting you must unlock the device first. Have a look at the "Loc" section.
Enter the Lo calibration menu by pressing the button![]() .
.
With the button ![]() you may switch to the next active channel on your device. The selected channel is indicated by light in the associated "wheel" LED.
you may switch to the next active channel on your device. The selected channel is indicated by light in the associated "wheel" LED.
With the buttons ![]() and
and ![]() you can change the weight value for the actual axle. Range is 0.00 to 100.
you can change the weight value for the actual axle. Range is 0.00 to 100.
When you press the button ![]() to store the entered value the Kimax device generates a corresponding AdL value for the active channel.
to store the entered value the Kimax device generates a corresponding AdL value for the active channel.
Lo values must be stored while truck is empty!
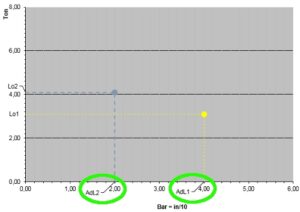
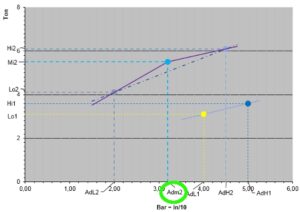
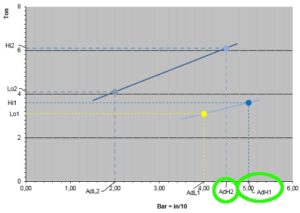
In this example 4 bar in-put on the front axle represents 3,1 ton axle load on the front axle, 2 bar in-put on the rear axle represents 4,1 ton axle load on the rear axle.
![]()
After saving the Lo values by pressing the button ![]() for each channel (axle/axle group) the current in-put is linked as "AdL" to the current empty axle load Lo as Lo calibration parameters. One Lo parameter consists of ((x;y) = (Adl1;Lo1)), x = in value, y = weight/load value.
for each channel (axle/axle group) the current in-put is linked as "AdL" to the current empty axle load Lo as Lo calibration parameters. One Lo parameter consists of ((x;y) = (Adl1;Lo1)), x = in value, y = weight/load value.
 You leave the Lo menu by pressing the button
 ![]() .
.
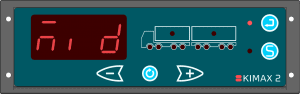
mid
![]() Attention - Whenever you want to change a setting you must unlock the device first. Have a look at the "Loc" section.
Attention - Whenever you want to change a setting you must unlock the device first. Have a look at the "Loc" section.
If one or more axles are configured for 3-pt calibration a mid load weight has to be entered while the actual mid load is present on the truck.
The procedure for entering the mid calibrating value is equal to the procedure for the Lo and the hi cal.
When a mid cal value has been entered the actual input (in this case axle 2) will be mirrored at the bent characteristic instead of being mirrored at the linear characteristic.
When a mid cal value has been entered the calibration line will divide into two lines with different slopes having the mid-point in common.
hi – Loaded calibration
![]() Attention - Whenever you want to change a setting you must unlock the device first. Have a look at the "Loc" section.
Attention - Whenever you want to change a setting you must unlock the device first. Have a look at the "Loc" section.
Enter the hi calibration menu by pressing the button![]() .
.
With the button ![]() you may switch to the next active channel.
you may switch to the next active channel.
The selected channel is indicated by light in the associated "wheel" LED.
With the buttons ![]() and
and ![]() you can change the weight value for the actual axle. Range is 0.00 to 100.
you can change the weight value for the actual axle. Range is 0.00 to 100.
When you press the button ![]() to store the entered value the Kimax device generates a corresponding Adh value for the active channel.
to store the entered value the Kimax device generates a corresponding Adh value for the active channel.
hi values must be stored while the truck is loaded with the actual load.
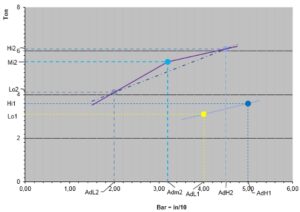
In this example 5 bar in-put on the front axle represents 3,6 ton axle load on the front axle, 4,5 bar in-put on the rear axle represents 6,1 ton axle load on the rear axle.
After saving the hi values by pressing the button ![]() for each channel (axle/axle group) the current in-put is linked with an "Adh" to the current loaded axle load hi as hi calibration parameters.
for each channel (axle/axle group) the current in-put is linked with an "Adh" to the current loaded axle load hi as hi calibration parameters.
After saving relevant Lo and hi calibration values, the live axle reading and gross weight reading are available for daily use.
You leave the hi menu by pressing the button ![]() .
.
AdL
![]() Attention - Whenever you want to change a setting you must unlock the device first. Have a look at the "Loc" section.
Attention - Whenever you want to change a setting you must unlock the device first. Have a look at the "Loc" section.
The AdL value for each axle is the actual input sensor reading from the moment you pressed the button ![]() during Lo calibration for the axles.
during Lo calibration for the axles.
With the button ![]() you may switch to the next active channel on your device. The selected channel is indicated by light in the associated "wheel" LED.
you may switch to the next active channel on your device. The selected channel is indicated by light in the associated "wheel" LED.
By pressing the button ![]() you enter the AdL menu, you can adjust the displayed AdL value by pressing the buttons
you enter the AdL menu, you can adjust the displayed AdL value by pressing the buttons ![]() or
or ![]() , the adjusted AdL value is saved by pressing the button
, the adjusted AdL value is saved by pressing the button ![]() .
.
Entering a new AdL value will not affect the corresponding Lo setting! Range for AdL 0.00 to 100.
You leave the AdL menu by pressing the button ![]() .
.

Adm
![]() Attention - Whenever you want to change a setting you must unlock the device first. Have a look at the "Loc" section.
Attention - Whenever you want to change a setting you must unlock the device first. Have a look at the "Loc" section.
The Adm value for each axle are the actual input sensor reading from the moment you pressed the button ![]() during mid calibration for the axles.
during mid calibration for the axles.
By pressing the button ![]() you enter the Adm menu, you can adjust the displayed Adm value by pressing the buttons
you enter the Adm menu, you can adjust the displayed Adm value by pressing the buttons ![]() or
or ![]() , the adjusted Adm value is saved by pressing the button
, the adjusted Adm value is saved by pressing the button ![]() .
.
Entering a new Adm value do not affect the corresponding mid setting!
You leave the Adm menu by pressing the button ![]() .
.
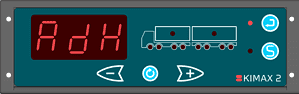
Adh
![]() Attention - Whenever you want to change a setting you must unlock the device first. Have a look at the "Loc" section.
Attention - Whenever you want to change a setting you must unlock the device first. Have a look at the "Loc" section.
The Adh value for each axle is the actual input sensor reading from the moment you pressed the button ![]() during hi calibration for the axles.
during hi calibration for the axles.
With the button ![]() you may switch to the next active channel on your device. The selected channel is indicated by light in the associated "wheel" LED.
you may switch to the next active channel on your device. The selected channel is indicated by light in the associated "wheel" LED.
By pressing the button ![]() you enter the Adh menu, you can adjust the displayed Adh value by pressing the buttons
you enter the Adh menu, you can adjust the displayed Adh value by pressing the buttons ![]() or
or ![]() , the adjusted Adh value is saved by pressing the button
, the adjusted Adh value is saved by pressing the button ![]() .
.
Entering a new Adh value do not affect the corresponding hi setting! The range for Adh is 0.00 to 100.
You leave the Adh menu by pressing the button ![]() .
.
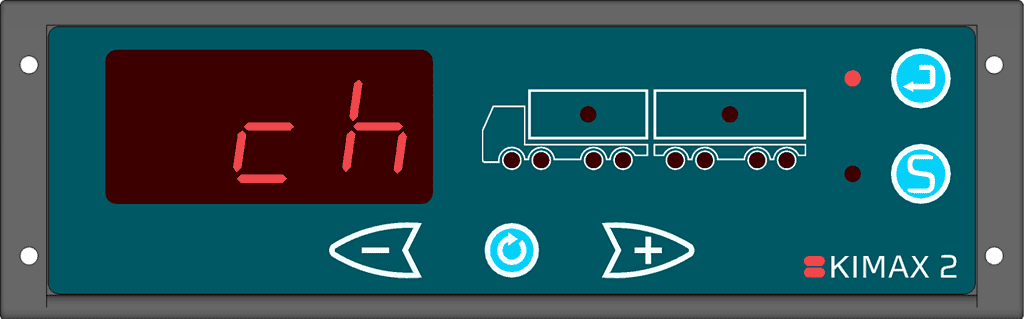
ch
![]() Attention - Whenever you want to change a setting you must unlock the device first. Have a look at the "Loc" section.
Attention - Whenever you want to change a setting you must unlock the device first. Have a look at the "Loc" section.
By pressing the button ![]() you enter the ch configuration menu.
you enter the ch configuration menu.
With the button ![]() you may switch to the next active channel.
you may switch to the next active channel.
The selected channel is indicated by a number in the display.
The LED(s) assigned to the actual channel is ON.
In this menu you can assign relevant axle LED(s) to the selected ch.
Pressing the button ![]() toggle the setting of the first active LED. Pressing the button
toggle the setting of the first active LED. Pressing the button ![]() saves the new status for that LED and set it steady ON or OFF.
saves the new status for that LED and set it steady ON or OFF.
You leave the ch menu by pressing the button ![]() .
.
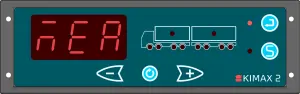
mEA
![]() Attention - Whenever you want to change a setting you must unlock the device first. Have a look at the "Loc" section.
Attention - Whenever you want to change a setting you must unlock the device first. Have a look at the "Loc" section.
By pressing the button ![]() you will enter the mEAn menu.
you will enter the mEAn menu.
With the button ![]() you may switch to the next active channel on your device. The selected channel is indicated by light in the associated "wheel" LED.
you may switch to the next active channel on your device. The selected channel is indicated by light in the associated "wheel" LED.
By pressing the buttons ![]() and
and ![]() you can select an average level ranging from 1 to 8.
you can select an average level ranging from 1 to 8.
1 is no filtering, 8 is filtering over the longest period of time (45 sec).
The selected filter setting is stored by pressing the button ![]() .
.
You leave the mEAn menu by pressing the button ![]() .
.
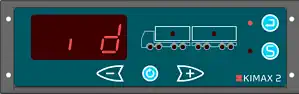
id
![]() Attention - Whenever you want to change a setting you must unlock the device first. Have a look at the "Loc" section.
Attention - Whenever you want to change a setting you must unlock the device first. Have a look at the "Loc" section.
The id menu is where you decide which unique number your device is transmitting data from. The number is used on handheld receivers and on devices with our Wi-Fi feature.
By pressing the button ![]() you enter id menu, the id value can be set by pressing the buttons
you enter id menu, the id value can be set by pressing the buttons ![]() and
and ![]() in the range 1 - 999.
in the range 1 - 999.
You store the selected id value by pressing the button ![]() .
.
You leave the id menu by pressing the button ![]() .
.
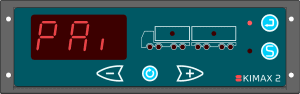
PAi
The PAir funtion is available on devices having WiFi functionality.
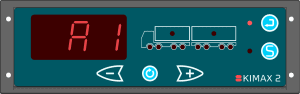
A1
![]() Attention - Whenever you want to change a setting you must unlock the device first. Have a look at the "Loc" section.
Attention - Whenever you want to change a setting you must unlock the device first. Have a look at the "Loc" section.
By pressing the button ![]() you will access the A1 Alarm menu.
you will access the A1 Alarm menu.
A1 is an individual alarm level for each input channel. When the weight of one or more channels exceeds their stored A1 levels, the associated axle LED(s) will start flashing.
With the button ![]() you may switch to the next active channel on your device. The selected channel is indicated by light in the associated "wheel" LED(s).
you may switch to the next active channel on your device. The selected channel is indicated by light in the associated "wheel" LED(s).
With the buttons ![]() and
and ![]() you can change the alarm value for the actual channel. Range is 0.00 to 100.
you can change the alarm value for the actual channel. Range is 0.00 to 100.
You store the value by pressing the button ![]() .
.
You leave the A1 menu by pressing the button ![]() .
.
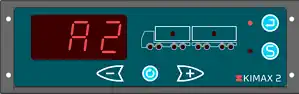
A2
![]() Attention - Whenever you want to change a setting you must unlock the device first. Have a look at the "Loc" section.
Attention - Whenever you want to change a setting you must unlock the device first. Have a look at the "Loc" section.
The input for the A2 alarm output is either any active single axle or axle group weight, gross weight for the vehicle or for the entire train, depending on the configuration of your Kimax device. The input source for the A2 value can be changed by the Kimax Terminal program.
By pressing the button ![]() you will get access to the Alarm A2 setting, the value can be changed by pressing the buttons
you will get access to the Alarm A2 setting, the value can be changed by pressing the buttons ![]() and
and ![]() , the new selected value can be saved by pressing the button
, the new selected value can be saved by pressing the button ![]() . Typical range for A2 setting is a reasonable value between empty weight and full load of the selected input for A2.
. Typical range for A2 setting is a reasonable value between empty weight and full load of the selected input for A2.
The alarm output switch from OFF to ON when the A2 level is exceeded by the corresponding weight reading and the output switches off when the weight reading is lower than A2 setting - the hy2 setting.
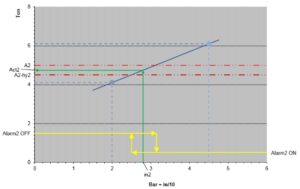
Example: A2 is set for 5 ton for a rear axle, hy2 is set to 0,5 ton for a light 2-axle truck.
As long as the weight reading is below 5 ton the alarm is OFF. When the weight reading exceeds 5 ton, the alarm switches ON and stays ON until the weight reading goes below 4,5 ton (A2 - hy2). When the weight reading goes below 4,5 ton the alarm output switches OFF and is OFF until 5 ton is exceeded again.
You leave the A2 menu by pressing the button ![]() .
.
Electric diagram for A2 connection
A3
![]() Attention - Whenever you want to change a setting you must unlock the device first. Have a look at the "Loc" section.
Attention - Whenever you want to change a setting you must unlock the device first. Have a look at the "Loc" section.
Input for the A3/hy3 alarm output is either any active single axle or axle group weight, gross weight for the vehicle or for the entire train, depending on configuration of your Kimax device.
Function of A3/hy3 is equal to function of A2/hy2
Electric diagram for connecting A3.
A4
![]() Attention - Whenever you want to change a setting you must unlock the device first. Have a look at the "Loc" section.
Attention - Whenever you want to change a setting you must unlock the device first. Have a look at the "Loc" section.
Input for the A4/hy4 alarm output is either any active single axle or axle group weight, gross weight for the vehicle or for the entire train, depending on configuration of your Kimax device.
Function of A4/hy4 is equal to function of A2/hy2.
Electric diagram for connecting A4.
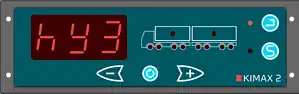
hy2
![]() Attention - Whenever you want to change a setting you must unlock the device first. Have a look at the "Loc" section.
Attention - Whenever you want to change a setting you must unlock the device first. Have a look at the "Loc" section.
hy2 is related to the A2 menu.
Input for the A2/hy2 alarm output is either any active single axle or axle group weight, gross weight for the vehicle or for the entire train, depending on configuration of your Kimax device.
By pressing ![]() you will get access to the Alarm hy2 setting, the indicated value can be changed by pressing the buttons
you will get access to the Alarm hy2 setting, the indicated value can be changed by pressing the buttons ![]() and
and ![]() , the new selected value can be saved by pressing the button
, the new selected value can be saved by pressing the button ![]() . Typical range for hy2 setting is a reasonable value between 0 and value set for A2.
. Typical range for hy2 setting is a reasonable value between 0 and value set for A2.
The alarm output switch from OFF to ON when the A2 level is exceeded by the corresponding weight reading and stays on until the corresponding weight reading goes below the A2 setting - hy2 setting.
Example: A2 is set for 5 ton for a rear axle, hy2 is set for 0,5 ton for a light 2-axle truck.
As long as the weight reading is below 5 ton the alarm stays OFF. When the weight reading exceed 5 ton, the alarm output switches ON and stays ON until the weight reading goes below 4,5 ton. When the weight reading goes below 4,5 ton the alarm output switches OFF and stays OFF until 5 ton is exceeded again.
You leave the A2 menu by pressing the button ![]() .
.
hy3
![]() Attention - Whenever you want to change a setting you must unlock the device first. Have a look at the "Loc" section.
Attention - Whenever you want to change a setting you must unlock the device first. Have a look at the "Loc" section.
Input for the A3/hy3 alarm output is either any active single axle or axle group weight, gross weight for the vehicle or for the entire train, depending on configuration of your Kimax device.
Function of A3/hy3 is equal to function of A2/hy2.
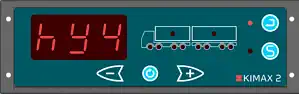
hy4
![]() Attention - Whenever you want to change a setting you must unlock the device first. Have a look at the "Loc" section.
Attention - Whenever you want to change a setting you must unlock the device first. Have a look at the "Loc" section.
Input for the A4/hy4 alarm output is either any active single axle or axle group weight, gross weight for the vehicle or for the entire train, depending on configuration of your Kimax device.
Function of A4/hy4 is equal to function of A2/hy2.
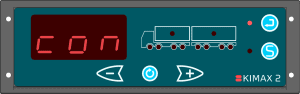
con
![]() Attention - Whenever you want to change a setting you must unlock the device first. Have a look at the "Loc" section.
Attention - Whenever you want to change a setting you must unlock the device first. Have a look at the "Loc" section.
By pressing the button ![]() you enter the container menu.
you enter the container menu.
The container setting can be used for neutralizing the tare weight of the container when it is a part of the vehicle payload.
Example 1:
The vehicle is Lo calibrated like shown here![]()
When a container is positioned on the vehicle, like shown here![]()
the payload of the vehicle is increased by the weight of the empty container (container tare weight). To neutralize this contribution from the empty container in the calculated payload, the container value can be saved at for instance 2,24 t. Now the 2,24 t will be subtracted from the vehicle payload, giving the actual payload of the content of the container.
This method can be useful when you switch between containers. It is important to remember to update the container value, when switching between containers with different container tare weight.
Example 2:
The vehicle is Lo calibrated like shown here![]()
The Container value is set to 0,00.
When something is put inside the container like shown here
only the actual load inside the container, is shown as the vehicle payload. This method is useful, when you always use the same container or switch between identical containers with the same container tare weight.
You leave the con menu by pressing the button ![]() .
.
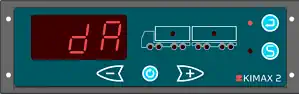
dA
![]() Attention - Whenever you want to change a setting you must unlock the device first. Have a look at the "Loc" section.
Attention - Whenever you want to change a setting you must unlock the device first. Have a look at the "Loc" section.
The dA menu is related to the internal clock function, The menu is for adjusting the dAte stamp on a printout from a connected printer.
By pressing the button ![]() you enter the dAte menu. The display will show "d.xx." and with the buttons
you enter the dAte menu. The display will show "d.xx." and with the buttons ![]() and
and ![]() you may change the dAte. Store the new dAte by pressing the button
you may change the dAte. Store the new dAte by pressing the button ![]() .
.
With the button ![]() you switch the display to "M.xx." and with the buttons
you switch the display to "M.xx." and with the buttons ![]() and
and ![]() you may change the month. Store the new month by pressing the button
you may change the month. Store the new month by pressing the button ![]() .
.
With the button ![]() you switch the display to "Y.xx" and with the buttons
you switch the display to "Y.xx" and with the buttons ![]() and
and ![]() you may change the year. Store the new year by pressing the button
you may change the year. Store the new year by pressing the button ![]() . The format is given as 20xx.
. The format is given as 20xx.
You leave the da menu by pressing the button ![]() .
.
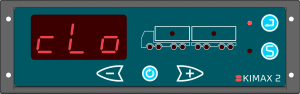
cLo
![]() Attention - Whenever you want to change a setting you must unlock the device first. Have a look at the "Loc" section.
Attention - Whenever you want to change a setting you must unlock the device first. Have a look at the "Loc" section.
The cLo menu is related to the internal clock function. The menu is for adjusting the time stamp on a printout from a connected printer.
By pressing the button ![]() you enter the cLock settings for the device. The display will show "h.xx.". With the buttons
you enter the cLock settings for the device. The display will show "h.xx.". With the buttons ![]() and
and ![]() you can change the hour setting. Store the setting by pressing the button
you can change the hour setting. Store the setting by pressing the button ![]() .
.
With the button ![]() the display will change to "M.xx". With the buttons
the display will change to "M.xx". With the buttons ![]() and
and ![]() you can change the Minute setting. Store the setting by pressing the button
you can change the Minute setting. Store the setting by pressing the button ![]() .
.
You leave the cLo menu by pressing the button ![]() .
.
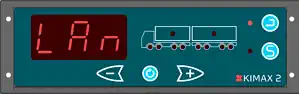
LAn
![]() Attention - Whenever you want to change a setting you must unlock the device first. Have a look at the "Loc" section.
Attention - Whenever you want to change a setting you must unlock the device first. Have a look at the "Loc" section.
The LAnguage menu is where you choose which LAnguage to be printed on a printout from a connected printer.
By pressing the button ![]() you enter LAnguage menu and the display will show a number ranging from 1-6. With the buttons
you enter LAnguage menu and the display will show a number ranging from 1-6. With the buttons ![]() and
and ![]() you may change the number. With the button
you may change the number. With the button ![]() you store the new setting.
you store the new setting.
- Danish
- English
- German
- Spanish
- French
- Swedish
You leave the LAn menu by pressing the button ![]() .
.
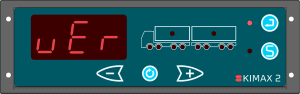
vEr
By pressing the button ![]() you will enter the software version menu. The display will indicate the selected device by turning on the LED(s) assigned to the device in question. The SW version of your Kimax device will be showed on the 3 digit display. To view the software versions of any devices connected to the system you may press the button
you will enter the software version menu. The display will indicate the selected device by turning on the LED(s) assigned to the device in question. The SW version of your Kimax device will be showed on the 3 digit display. To view the software versions of any devices connected to the system you may press the button ![]() .
.
You leave the vEr menu by pressing the button ![]() .
.
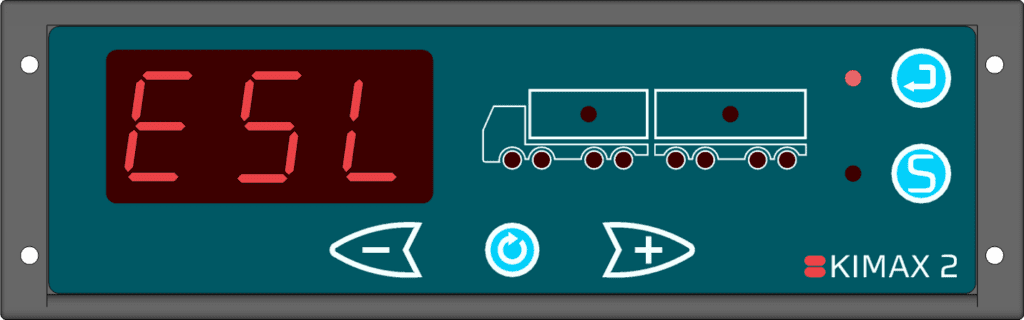
ESL![]() Attention - Whenever you want to change a setting you must unlock the device first. Have a look at the "Loc" section.
Attention - Whenever you want to change a setting you must unlock the device first. Have a look at the "Loc" section.
The EBS SeLect menu is where you can enable/disable the reception of weight messages from the EBS.
By pressing the button ![]() you enter the EBS SeLect menu and the display will show a number, ranging from 0 – 5. With the buttons
you enter the EBS SeLect menu and the display will show a number, ranging from 0 – 5. With the buttons ![]() and
and ![]() you may change the number. With the button
you may change the number. With the button ![]() you can store the new setting.
you can store the new setting.
- EBS Disabled (Weight messages from the EBS are NOT received)
- EBS Trailer 1 only (Only receiving weight message from the identifier 0x18FEC4C8)
- EBS Trailer 2 only (Only receiving weight message from the identifier 0x18FEC4C0)
- EBS Trailer 3 only (Only receiving weight message from the identifier 0x18FEC4B8)
- EBS Trailer 4 only (Only receiving weight message from the identifier 0x18FEC4B0)
- EBS Trailers 1 – 4 (Receiving weight messages from the identifiers above)
You leave the EBS SeLect menu by pressing the button ![]() .
.
Information:
ESL = 0: E1S, E2S, E3S and E4S are disabled.
ESL = 1: E1S is enabled. E2S, E3S and E4S are disabled.
ESL = 2: E2S is enabled. E1S, E3S and E4S are disabled.
ESL = 3: E3S is enabled. E1S, E2S and E4S are disabled.
ESL = 4: E4S is enabled. E1S, E2S and E3S are disabled.
ESL = 5: E1S, E2S, E3S and E4S are enabled.
EBS Trailer Examples:

EBS Trailer 1

EBS Trailer 1

EBS Trailer 1 + EBS Trailer 2

EBS Trailer 1 + EBS Trailer 2 + EBS Trailer 3

EBS Trailer 1 (Dolly) + EBS Trailer 2 + EBS Trailer 3 (Dolly) + EBS Trailer 4
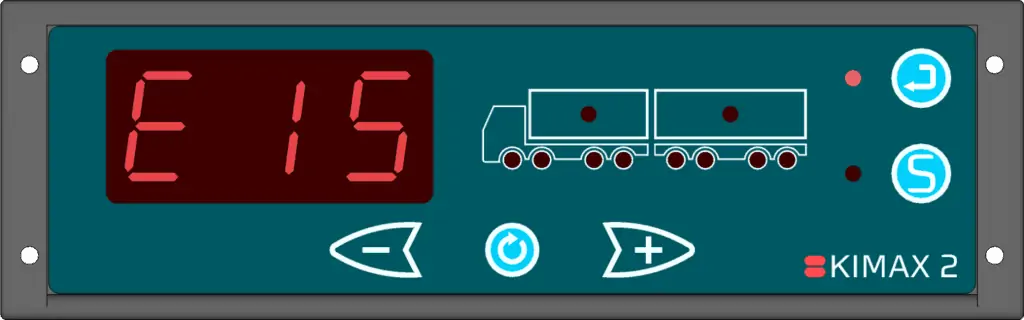
E1S
![]() Attention - Whenever you want to change a setting you must unlock the device first. Have a look at the "Loc" section.
Attention - Whenever you want to change a setting you must unlock the device first. Have a look at the "Loc" section.
The EBS 1 Setting menu is where you can enable/disable the reception and define how to use the weight message from the EBS Trailer 1 (Identifier: 0x18FEC4C8).
By pressing the button ![]() you enter the EBS 1 Setting menu and the display will show a number, ranging from 0 – 5. With the buttons
you enter the EBS 1 Setting menu and the display will show a number, ranging from 0 – 5. With the buttons ![]() and
and ![]() you may change the number. With the button
you may change the number. With the button ![]() you can store the new setting.
you can store the new setting.
- Disabled (The input from the EBS Trailer 1 will NOT be received)
- Calibration 1 (The EBS Trailer 1 input is combined with calibration 1)
- Calibration 2 (The EBS Trailer 1 input is combined with calibration 2)
- Calibration 3 (The EBS Trailer 1 input is combined with calibration 3)
- Calibration 4 (The EBS Trailer 1 input is combined with calibration 4)
- Direct EBS input (The EBS Trailer 1 input is used directly)
You leave the EBS 1 Setting menu by pressing the button ![]() .
.
Information:
The EBS 1 Setting is only active when ESL = 1 or ESL = 5.

E2S
![]() Attention - Whenever you want to change a setting you must unlock the device first. Have a look at the "Loc" section.
Attention - Whenever you want to change a setting you must unlock the device first. Have a look at the "Loc" section.
The EBS 2 Setting menu is where you can enable/disable the reception and define how to use the weight message from the EBS Trailer 2 (Identifier: 0x18FEC4C0).
By pressing the button ![]() you enter the EBS 2 Setting menu and the display will show a number, ranging from 0 – 5. With the buttons
you enter the EBS 2 Setting menu and the display will show a number, ranging from 0 – 5. With the buttons ![]() and
and ![]() you may change the number. With the button
you may change the number. With the button ![]() you can store the new setting.
you can store the new setting.
- Disabled (The input from the EBS Trailer 2 will NOT be received)
- Calibration 1 (The EBS Trailer 2 input is combined with calibration 1)
- Calibration 2 (The EBS Trailer 2 input is combined with calibration 2)
- Calibration 3 (The EBS Trailer 2 input is combined with calibration 3)
- Calibration 4 (The EBS Trailer 2 input is combined with calibration 4)
- Direct EBS input (The EBS Trailer 2 input is used directly)
You leave the EBS 2 Setting menu by pressing the button ![]() .
.
Information:
The EBS 2 Setting is only active when ESL = 2 or ESL = 5.
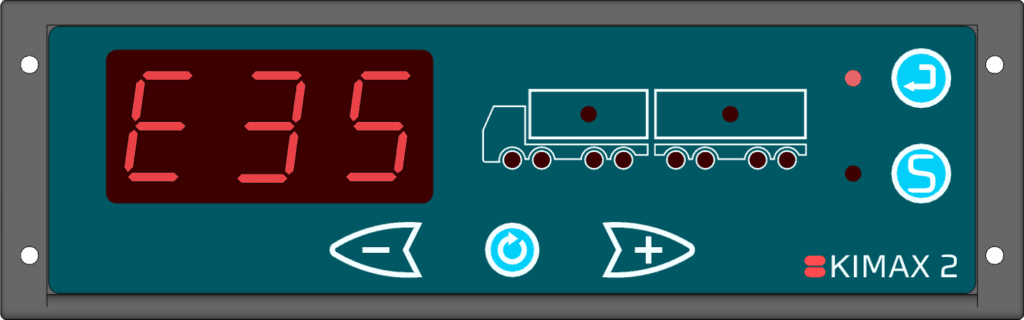
E3S
![]() Attention - Whenever you want to change a setting you must unlock the device first. Have a look at the "Loc" section.
Attention - Whenever you want to change a setting you must unlock the device first. Have a look at the "Loc" section.
The EBS 3 Setting menu is where you can enable/disable the reception and define how to use the weight message from the EBS Trailer 3 (Identifier: 0x18FEC4B8).
By pressing the button ![]() you enter the EBS 3 Setting menu and the display will show a number, ranging from 0 – 5. With the buttons
you enter the EBS 3 Setting menu and the display will show a number, ranging from 0 – 5. With the buttons ![]() and
and ![]() you may change the number. With the button
you may change the number. With the button ![]() you can store the new setting.
you can store the new setting.
- Disabled (The input from the EBS Trailer 3 will NOT be received)
- Calibration 1 (The EBS Trailer 3 input is combined with calibration 1)
- Calibration 2 (The EBS Trailer 3 input is combined with calibration 2)
- Calibration 3 (The EBS Trailer 3 input is combined with calibration 3)
- Calibration 4 (The EBS Trailer 3 input is combined with calibration 4)
- Direct EBS input (The EBS Trailer 3 input is used directly)
You leave the EBS 3 Setting menu by pressing the button ![]() .
.
Information:
The EBS 3 Setting is only active when ESL = 3 or ESL = 5.
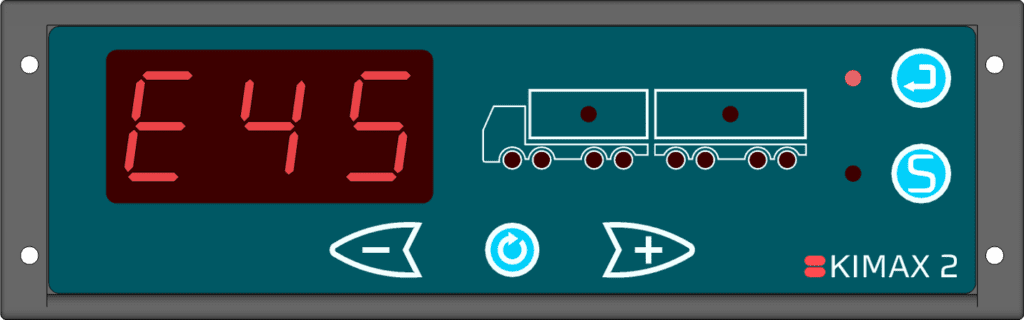
E4S
![]() Attention - Whenever you want to change a setting you must unlock the device first. Have a look at the "Loc" section.
Attention - Whenever you want to change a setting you must unlock the device first. Have a look at the "Loc" section.
The EBS 4 Setting menu is where you can enable/disable the reception and define how to use the weight message from the EBS Trailer 4 (Identifier: 0x18FEC4B0).
By pressing the button ![]() you enter the EBS 4 Setting menu and the display will show a number, ranging from 0 – 5. With the buttons
you enter the EBS 4 Setting menu and the display will show a number, ranging from 0 – 5. With the buttons ![]() and
and ![]() you may change the number. With the button
you may change the number. With the button ![]() you can store the new setting.
you can store the new setting.
- Disabled (The input from the EBS Trailer 4 will NOT be received)
- Calibration 1 (The EBS Trailer 4 input is combined with calibration 1)
- Calibration 2 (The EBS Trailer 4 input is combined with calibration 2)
- Calibration 3 (The EBS Trailer 4 input is combined with calibration 3)
- Calibration 4 (The EBS Trailer 4 input is combined with calibration 4)
- Direct EBS input (The EBS Trailer 4 input is used directly)
You leave the EBS 4 Setting menu by pressing the button ![]() .
.
Information:
The EBS 4 Setting is only active when ESL = 4 or ESL = 5.
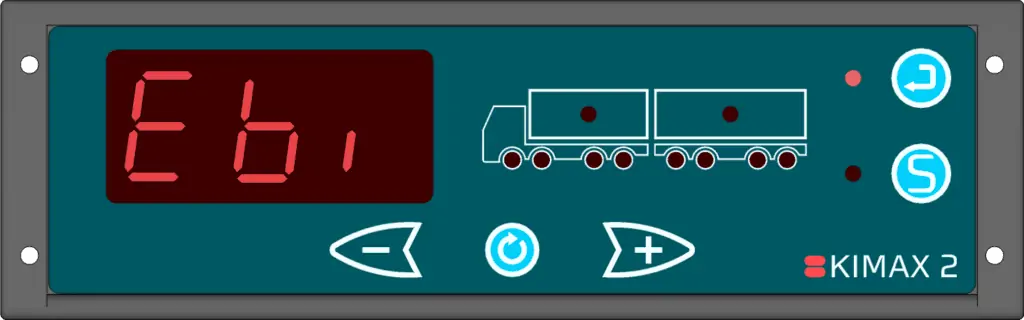
Ebi
The EbS input menu is where you can monitor the input from the selected EBS Trailer(s) (Selected in the ESL menu).
By pressing the button ![]() you enter the EbS input menu. The display will show the input(s) selected by the ESL setting. If the ESL setting is set to 5 (EBS Trailers 1 - 4), it is possible to go to the next input, by pressing the button
you enter the EbS input menu. The display will show the input(s) selected by the ESL setting. If the ESL setting is set to 5 (EBS Trailers 1 - 4), it is possible to go to the next input, by pressing the button ![]() .
.
Before the input value is shown, “tr1”,”tr2”, “tr3” or “tr4” is shown briefly on the display, to indicate which of the trailer inputs is shown.
You leave the EbS input menu by pressing the button ![]() .
.
Information:
The EbS input menu is only active when one of the following 5 conditions is true.
- ESL = 1 and E1S > 0
- ESL = 2 and E2S > 0
- ESL = 3 and E3S > 0
- ESL = 4 and E4S > 0
- ESL = 5 and ( E1S > 0 or E2S > 0 or E3S > 0 or E4S > 0 )
ELW
![]() Attention - Whenever you want to change a setting you must unlock the device first. Have a look at the "Loc" section.
Attention - Whenever you want to change a setting you must unlock the device first. Have a look at the "Loc" section.
The EBS Low Weight menu is where you give in the weight of your empty EBS-trailer.


By pressing the button ![]() you enter the EBS Low Weight menu and the display will show the first active EBS Low Weight calibration value. Which trailer and used calibration, is shown briefly on the display before the actual value. It is shown in the format, “XcY”, where X indicates which trailer and Y which calibration. Example: “1c2” = trailer 1, calibration 2.The EBS Low Weight calibration value is within the range: 0.00 – 100.It is possible to go to the next active calibration value, by pressing the button
you enter the EBS Low Weight menu and the display will show the first active EBS Low Weight calibration value. Which trailer and used calibration, is shown briefly on the display before the actual value. It is shown in the format, “XcY”, where X indicates which trailer and Y which calibration. Example: “1c2” = trailer 1, calibration 2.The EBS Low Weight calibration value is within the range: 0.00 – 100.It is possible to go to the next active calibration value, by pressing the button ![]() . With the buttons
. With the buttons ![]() and
and ![]() you may change the number. With the button
you may change the number. With the button ![]() you can store the new setting. Be aware: When this value is stored, also the current corresponding Ebi value is stored as Elo (like the storage of Lo, where also the current corresponding input is stored as AdL). You leave the EBS Low Weight menu by pressing the button
you can store the new setting. Be aware: When this value is stored, also the current corresponding Ebi value is stored as Elo (like the storage of Lo, where also the current corresponding input is stored as AdL). You leave the EBS Low Weight menu by pressing the button ![]() .
.
Information:
The EBS Low Weight menu is only active when one of the following 5 conditions is true.
- ESL = 1 and E1S > 0 and E1S < 5
- ESL = 2 and E2S > 0 and E2S < 5
- ESL = 3 and E3S > 0 and E3S < 5
- ESL = 4 and E4S > 0 and E4S < 5
- ESL = 5 and ( (0 < E1S < 5) or (0 < E2S < 5) or (0 < E3S < 5) or (0 < E4S < 5) )
The possible ranges of X and Y are: X = {1,2,3,4} and Y = {1,2,3,4}
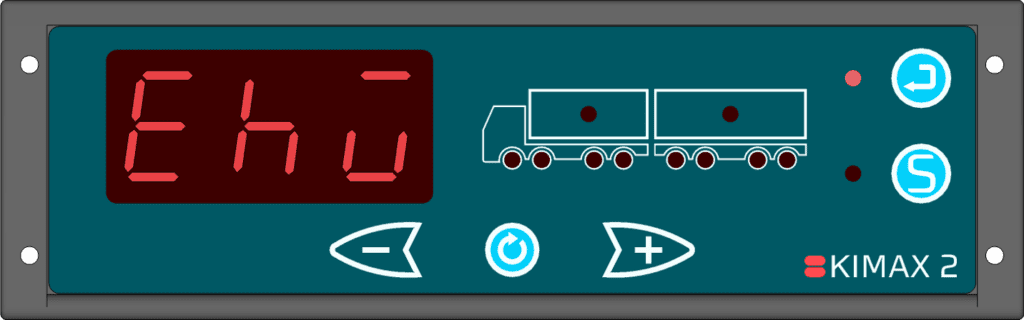
EhW
![]() Attention - Whenever you want to change a setting you must unlock the device first. Have a look at the "Loc" section.
Attention - Whenever you want to change a setting you must unlock the device first. Have a look at the "Loc" section.
The EBS hi Weight menu is where you give in the weight of your loaded EBS-trailer.


By pressing the button ![]() you enter the EBS hi Weight menu and the display will show the first active EBS hi Weight calibration value. Which trailer and used calibration, is shown briefly on the display before the actual value. It is shown in the format, “XcY”, where X indicates which trailer and Y which calibration. Example: “1c2” = trailer 1, calibration 2.
you enter the EBS hi Weight menu and the display will show the first active EBS hi Weight calibration value. Which trailer and used calibration, is shown briefly on the display before the actual value. It is shown in the format, “XcY”, where X indicates which trailer and Y which calibration. Example: “1c2” = trailer 1, calibration 2.
The EBS hi Weight calibration value is within the range: 0.00 – 100.
It is possible to go to the next active calibration value, by pressing the button ![]() .
.
With the buttons ![]() and
and ![]() you may change the number.
you may change the number.
With the button ![]() you can store the new setting. Be aware: When this value is stored, also the current corresponding Ebi value is stored as Ehi (like the storage of hi, where also the current corresponding input is stored as AdH).
you can store the new setting. Be aware: When this value is stored, also the current corresponding Ebi value is stored as Ehi (like the storage of hi, where also the current corresponding input is stored as AdH).
You leave the EBS hi Weight menu by pressing the button ![]() .
.
Information:
The EBS hi Weight menu is only active when one of the following 5 conditions is true.
- ESL = 1 and E1S > 0 and E1S < 5
- ESL = 2 and E2S > 0 and E2S < 5
- ESL = 3 and E3S > 0 and E3S < 5
- ESL = 4 and E4S > 0 and E4S < 5
- ESL = 5 and ( (0 < E1S < 5) or (0 < E2S < 5) or (0 < E3S < 5) or (0 < E4S < 5) )
The possible ranges of X and Y are: X = {1,2,3,4} and Y = {1,2,3,4}
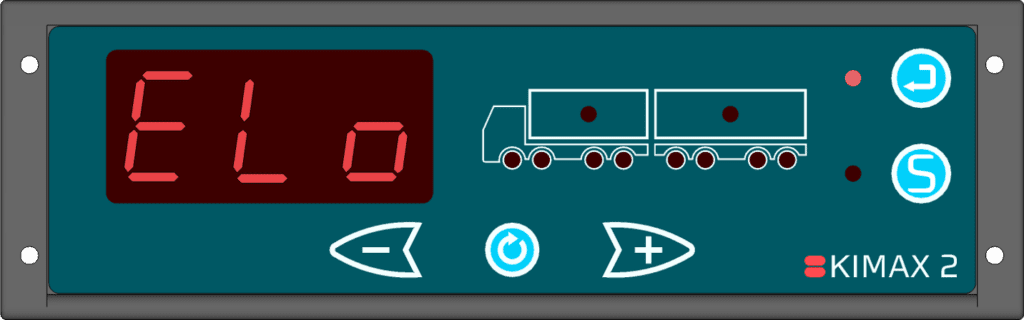
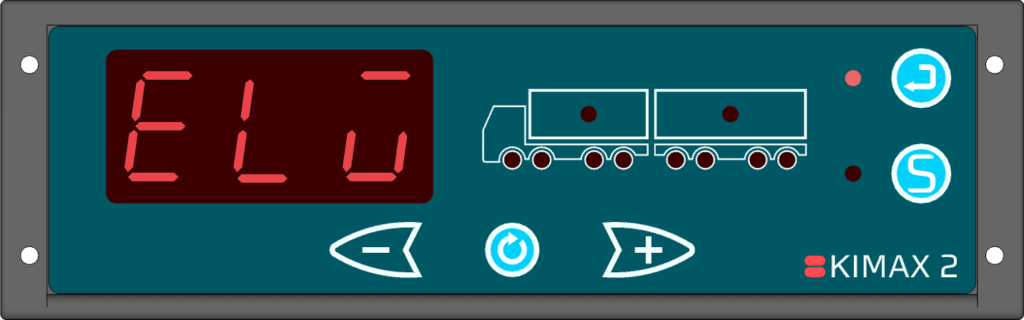
ELo
![]() Attention - Whenever you want to change a setting you must unlock the device first. Have a look at the "Loc" section.
Attention - Whenever you want to change a setting you must unlock the device first. Have a look at the "Loc" section.
The EBS Lo menu is where you can adjust the specific input value you want to produce the weight value given in ELW.


By pressing the button ![]() you enter the EBS Lo menu and the display will show the first active EBS Lo calibration value. Which trailer and used calibration, is shown briefly on the display before the actual value. It is shown in the format, “XcY”, where X indicates which trailer and Y which calibration. Example: “1c2” = trailer 1, calibration 2.
you enter the EBS Lo menu and the display will show the first active EBS Lo calibration value. Which trailer and used calibration, is shown briefly on the display before the actual value. It is shown in the format, “XcY”, where X indicates which trailer and Y which calibration. Example: “1c2” = trailer 1, calibration 2.
The EBS Lo calibration value is within the range: 0.00 – 100.
It is possible to go to the next active calibration value, by pressing the button ![]() .
.
With the buttons ![]() and
and ![]() you may change the number.
you may change the number.
With the button ![]() you can store the new setting. Be aware: The EBS Lo calibration value is also stored, by using the current corresponding Ebi value, when storing a new ELW value (like when the current input is stored as AdL, when a Lo value is stored).
you can store the new setting. Be aware: The EBS Lo calibration value is also stored, by using the current corresponding Ebi value, when storing a new ELW value (like when the current input is stored as AdL, when a Lo value is stored).
You leave the EBS Lo menu by pressing the button ![]() .
.
Information:
The EBS Lo menu is only active when one of the following 5 conditions is true.
- ESL = 1 and E1S > 0 and E1S < 5
- ESL = 2 and E2S > 0 and E2S < 5
- ESL = 3 and E3S > 0 and E3S < 5
- ESL = 4 and E4S > 0 and E4S < 5
- ESL = 5 and ( (0 < E1S < 5) or (0 < E2S < 5) or (0 < E3S < 5) or (0 < E4S < 5) )
The possible ranges of X and Y are: X = {1,2,3,4} and Y = {1,2,3,4}
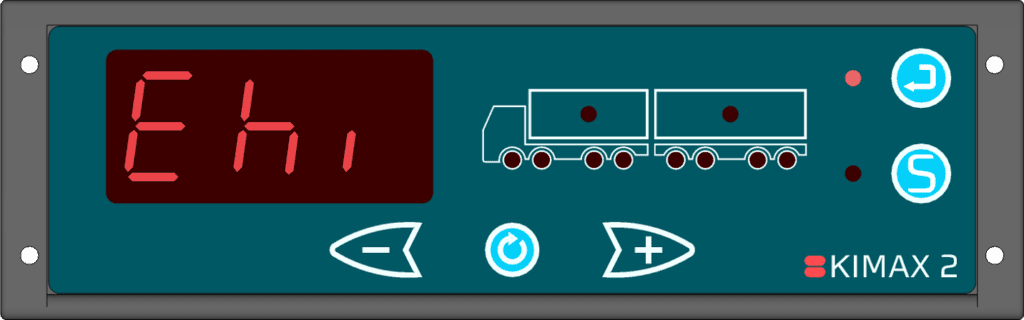
Ehi
![]() Attention - Whenever you want to change a setting you must unlock the device first. Have a look at the "Loc" section.
Attention - Whenever you want to change a setting you must unlock the device first. Have a look at the "Loc" section.
The EBS hi menu is where you can adjust the specific input value you want to produce the weight value given in EhW.


By pressing the button ![]() you enter the EBS hi menu and the display will show the first active EBS hi calibration value. Which trailer and used calibration, is shown briefly on the display before the actual value. It is shown in the format, “XcY”, where X indicates which trailer and Y which calibration. Example: “1c2” = trailer 1, calibration 2.
you enter the EBS hi menu and the display will show the first active EBS hi calibration value. Which trailer and used calibration, is shown briefly on the display before the actual value. It is shown in the format, “XcY”, where X indicates which trailer and Y which calibration. Example: “1c2” = trailer 1, calibration 2.
The EBS hi calibration value is within the range: 0.00 – 100.
It is possible to go to the next active calibration value, by pressing the button ![]() .
.
With the buttons ![]() and
and ![]() you may change the number.
you may change the number.
With the button ![]() you can store the new setting. Be aware: The EBS hi calibration value is also stored, by using the current corresponding Ebi value, when storing a new EhW value (like when the current input is stored as AdH, when a Hi value is stored).
you can store the new setting. Be aware: The EBS hi calibration value is also stored, by using the current corresponding Ebi value, when storing a new EhW value (like when the current input is stored as AdH, when a Hi value is stored).
You leave the EBS Lo menu by pressing the button ![]() .
.
Information:
The EBS hi menu is only active when one of the following 5 conditions is true.
- ESL = 1 and E1S > 0 and E1S < 5
- ESL = 2 and E2S > 0 and E2S < 5
- ESL = 3 and E3S > 0 and E3S < 5
- ESL = 4 and E4S > 0 and E4S < 5
- ESL = 5 and ( (0 < E1S < 5) or (0 < E2S < 5) or (0 < E3S < 5) or (0 < E4S < 5) )
The possible ranges of X and Y are: X = {1,2,3,4} and Y = {1,2,3,4}
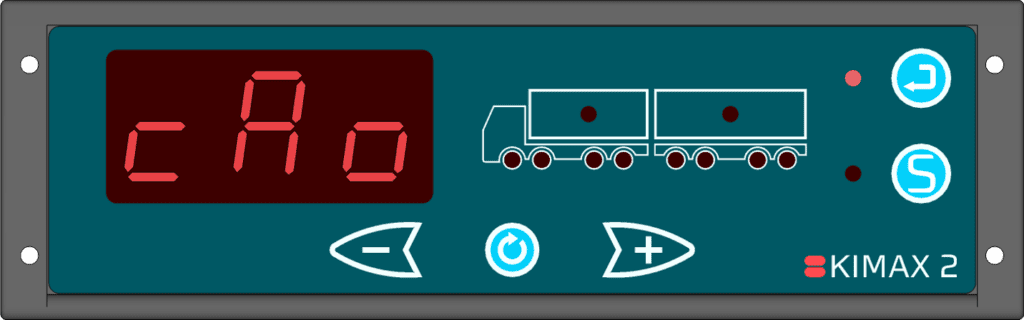
cAo
![]() Attention - Whenever you want to change a setting you must unlock the device first. Have a look at the "Loc" section.
Attention - Whenever you want to change a setting you must unlock the device first. Have a look at the "Loc" section.
The cAN output menu is where you can enable/disable the broadcasting of weight messages from the Kimax device (Identifier: 0x18FEEA61).
By pressing the button ![]() you enter the cAN output menu and the display will show a number ranging from 0 – 1. With the buttons
you enter the cAN output menu and the display will show a number ranging from 0 – 1. With the buttons ![]() and
and ![]() you may change the number. With the button
you may change the number. With the button ![]() you can store the new setting.
you can store the new setting.
- Disabled (The weight values will NOT be broadcasted by the Kimax)
- Enabled (The weight values are broadcasted by the Kimax)
You leave the cAN output menu by pressing the button ![]() .
.
Information:
When enabled, the Kimax device will broadcast the weight values from the system to a connected CAN bus (ISO 11898). The setting is only relevant for Kimax devices with specific part numbers, where a CAN transceiver is included.
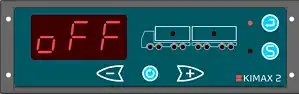
oFF
Press the button ![]() to leave the Kimax menu and return to daily weight reading.
to leave the Kimax menu and return to daily weight reading.